|
|
|||||||||||||||||||||||||||||||||||||||||||||||||||||||||||||||||
| Most modern
Unix like operating systems (e.g. Linux, MacOS X, and BSD) come with (
or can be installed ) a little console-mode utility called GNU Screen. Even some of the power user who work exclusively on console are unaware of its existence. What is screen ? Screen is best described as a terminal multiplexer. That is any number of console applications can be run concurrently with in a single terminal and you can quickly switch back and forth between these applications. If you are logged to a remote server via ssh , you can run many applications in a single ssh session. The programs will be running even if you accidentally close the ssh connection.\ Starting screen: launching and switching between programs Start screen just by typing screen at your favourite command shell prompt. You'll probably be greeted by a welcome message. Dismiss this and you'll have with an empty terminal containing a shell prompt, which is pretty much what you had before you started screen. Every program running under screen runs in a window, and every window is identified by a unique number. Screen made a new window, numbered it 0, and started a command shell inside it. Let us run ls command in this window or any other command so that we can recognise the window later on. Now make another window; this will be window 1. To do this, type C-a c; that is, type Ctrl-a and then type c Now that you have two windows, . To switch between windows , type C-a C-a, which will switch you to whichever window you were using before the current one. Here are some more window switching key sequences if you have many windows open under screen.
Exiting the last program in a window will cause the window to disappear. You can also kill misbehaving programs with C-a K. Terminal decoupling and re coupling You can detach from the screen session by pressing C-a d. This means the screen session will be decoupled from the terminal in which you started it up. If you close the terminal in which screen is running , the session will be automatically detached. Detaching a screen session does not terminate any of the programs running in that screen session . Start up a new terminal emulator, and type screen -r . You'll be right back where you were when you detached. You can detach from a screen session at work, shell into the machine from home, and reattach. Copying, pasting, and the scrollback buffer Screen remembers a configurable number of scrollback lines, and you'll need them because you won't be able to use your terminal emulator's scroll features while running screen. You can access the scrollback buffer by entering "copy mode", which is accomplished by typing C-a [. You can mark text anywhere in the scrollback buffer and paste it with C-a ]. Monitoring for silence and activity One of the disadvantages of running a bunch of programs within screen is that you can't keep an eye on all of them at the same time, since in general you can only see one at once. ) To help mitigate this problem, Screen has features that allow you to monitor a window for silence--useful for knowing when a compile has finished, for example--or activity--useful for knowing when someone is finally talking on your favourite IRC channel, for example. To start or stop monitoring the current window for 30 seconds of silence, type C-a _; to start or stop monitoring a window for activity, type C-a M. Config Files Screen looks for a startup configuration file named .screenrc in your home directory. Look in screen man pages for options. | |||||||||||||||||||||||||||||||||||||||||||||||||||||||||||||||||
Wednesday, December 19, 2012
Command-Line Multitasking with Screen
Friday, December 14, 2012
Remote control your desktop with android phone
Gmote can
also be used as a wireless Touchpad and keyboard, allowing you to
control your computer at distance.
Gmote has the ability to stream music from your computer to your phone!
Gmote has to be set up both on your computer and on your android phone.Here are the steps.
Setting up the Gmote Server on PC
The Gmote Server requires the Java JVM version 1.6 or higher.
To determine your java version, go to terminal and type 'java -version'.
You can download the latest JVM from http://www.java.com/en/download/index.jsp
On the computer you wish to control, download and install the appropriate package for your Ubuntu Linux system - here, after successful installation, open the terminal and type following command:
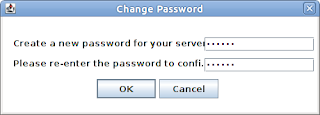
tar -zxvf GmoteServerLinux2.0.0.tar.gzOn starting you'll see a password prompt. This allows you to set a password so that only you can connect to the server from your phone. You'll be asked to enter this password once on the phone as well. You can change your password later by right clicking on the Gmote server icon (task bar) and selecting 'Change password'.
cd GmoteServerLinux2.0.0/
./GmoteServer.sh
Finally Gmore server will get started on port 8889, make sure to adjust your firewall rules accordingly to allow connection on port 8889.
Setting up the Gmote Client:
The installation process for client is fairly simple. From your Android handset, download and install the Gmote client.
You need wifi or 3G connectivity between your phone and PC.
Launch Gmote from your phone, select the server to connect to, and enjoy.
Launch Gmote from your phone, select the server to connect to, and enjoy.
Tuesday, December 11, 2012
sudo on ubuntu
Here are some sudo variations I use. (Be careful :) )
sudo command - run command as root
sudo su – root shell open
sudo su user – open shell as a user
sudo -k – forget your password sudo
gksudo command – sudo visual dialog (GNOME)
kdesudo command – sudo visual dialog (KDE)
sudo visudo – edit / etc / sudoers
gksudo nautilus – root file manager (GNOME)
kdesudo konqueror – root file manager (KDE)
How to customize the GRUB 2 in Ubuntu
GRUB 2 is the next generation of GNU GRUB. All recent versions of ubuntu come with GRUB 2. GRUB 2 cleaner, safer, more robust, more portable and more
powerful.
If you're already familiar with older GRUB, GRUB 2 configuration file is similar in broad sense, but it varies in many finer details. Some times it can be a bit tricky too.
The main config file is /etc/default/grub . Open it using
$ sudo gedit /etc/default/grub
you will see some thing very similar to the following ....
Change default Timeout:
To change the default timeout option in GRUB 2, you just need to change the GRUB_TIMEOUT parameter. The value of this parameter is in sec, change this value as per your requirement.
Change the default boot option:
To change the default boot option in GRUB 2, you just need to change the GRUB_DEFAULT parameter. 0 is the first entry, so if you want Windows to be your default boot option which is, say at, 5th position in the grub menu, then you just need to change the GRUB_DEFAULT value to 4 and save the file and close it. Save the file after making all the required changes and from the terminal run the following command
If you're already familiar with older GRUB, GRUB 2 configuration file is similar in broad sense, but it varies in many finer details. Some times it can be a bit tricky too.
The main config file is /etc/default/grub . Open it using
$ sudo gedit /etc/default/grub
you will see some thing very similar to the following ....
# If you change this file, run 'update-grub' afterwards to update
# /boot/grub/grub.cfg.
GRUB_DEFAULT=0
#GRUB_HIDDEN_TIMEOUT=0
GRUB_HIDDEN_TIMEOUT_QUIET=true
GRUB_TIMEOUT=7
GRUB_DISTRIBUTOR=`lsb_release -i -s 2> /dev/null || echo Debian`
GRUB_CMDLINE_LINUX_DEFAULT="quiet splash"
GRUB_CMDLINE_LINUX=""
# Uncomment to enable BadRAM filtering, modify to suit your needs
# This works with Linux (no patch required) and with any kernel that obtains
# the memory map information from GRUB (GNU Mach, kernel of FreeBSD ...)
#GRUB_BADRAM="0x01234567,0xfefefefe,0x89abcdef,0xefefefef"
# Uncomment to disable graphical terminal (grub-pc only)
#GRUB_TERMINAL=console
# The resolution used on graphical terminal
# note that you can use only modes which your graphic card supports via VBE
# you can see them in real GRUB with the command `vbeinfo'
GRUB_GFXMODE=640x480
# Uncomment if you don't want GRUB to pass "root=UUID=xxx" parameter to Linux
#GRUB_DISABLE_LINUX_UUID=true
# Uncomment to disable generation of recovery mode menu entries
#GRUB_DISABLE_LINUX_RECOVERY="true"
# Uncomment to get a beep at grub start
#GRUB_INIT_TUNE="480 440 1"
Some of the important configuration options you can try changing are
Change default Timeout:
To change the default timeout option in GRUB 2, you just need to change the GRUB_TIMEOUT parameter. The value of this parameter is in sec, change this value as per your requirement.
Change the default boot option:
To change the default boot option in GRUB 2, you just need to change the GRUB_DEFAULT parameter. 0 is the first entry, so if you want Windows to be your default boot option which is, say at, 5th position in the grub menu, then you just need to change the GRUB_DEFAULT value to 4 and save the file and close it. Save the file after making all the required changes and from the terminal run the following command
sudo update-grub
How to disable a user account in linux
The easiest way to lock a user account on Linux machines is to use -l option to passwd command.
Open a terminal and acquire root
# passwd -l abc ( abc is the user you want to lock.)
You can unlock the account with -u option
#passwd -u abc
:)
Open a terminal and acquire root
# passwd -l abc ( abc is the user you want to lock.)
You can unlock the account with -u option
#passwd -u abc
:)
Sunday, June 24, 2012
Multimedia & Video Howto on Ubuntu 12.04
The easiest way to get most of the media format working on ubuntu 12.04 is to enable medibuntu repository and install couple of extra packages.
This can be done quickly as follows.
Copy the following line to a command prompt
Then install the packages.This can be done quickly as follows.
Copy the following line to a command prompt
sudo -E wget --output-document=/etc/apt/sources.list.d/medibuntu.list http://www.medibuntu.org/sources.list.d/$(lsb_release -cs).list && sudo sed -i "/^# deb .*partner/ s/^# //" /etc/apt/sources.list && sudo apt-get --quiet update && sudo apt-get -y --force-yes --quiet --allow-unauthenticated install medibuntu-keyring app-install-data-medibuntu apport-hooks-medibuntu && sudo apt-get update
sudo apt-get install ubuntu-restricted-extras non-free-codecs p7zip-rar acroread gimp inkscape blender smplayer vlc libdvdcss2 libdvdread4 faac faad audacious rubyripper cd-discid aacplusenc gtkpod lame cdrdao aacgain flac mp3gain normalize-audio vorbisgain arista soundconverter gnome-sushi exfalso winff devede openshot audacity cheese synaptic gconf-editor lsb-core
Saturday, June 23, 2012
Dangerous commands you should not try
I was browsing through Ubuntu forums when I saw this list of dangerous commands. I am copying them for my own reference. Don't try them out.
1) Delete all files, delete current directory, and delete visible files in current directory.
2) Reformat. This command will reformat your hard disk ( you may need superuser permission to run) 1) Delete all files, delete current directory, and delete visible files in current directory.
rm -rf /
rm -rf .
rm -rf *
mkfs
mkfs.ext3
mkfs.anything
3) Block device manipulation . These commands manipulate underlying block device. ( here also you may need root permission)
any_command > /dev/sda
dd if=something of=/dev/sda
4) Forkbomb : This will spawn a number of processes and eventually your system will hang. ( This works for bash shell )
:(){:|:&};:
Friday, April 27, 2012
Transparent Proxy on Linux using redsocks
Adapted form http://pritambaral.com/2012/04/transparent-proxy-on-linux/
This post is targeted at those Linux users behind a network proxy but cannot set it in an app, or are just plain lazy to go about telling every app to use a proxy. I’ll give a quick rundown of the instructions for those in haste, with geeky details following towards the end. I’m assuming a fairly recent distro here, and I’m targeting the Ubuntu 12.04 release.
What we’ll need:
- A Linux OS (obviously!)
- redsocks (an app, check in your repos, or compile it yourself)
- a text-editor
*nat
:PREROUTING ACCEPT [0:0]
:INPUT ACCEPT [0:0]
:OUTPUT ACCEPT [0:0]
:POSTROUTING ACCEPT [0:0]
-A OUTPUT -d 10.0.0.0/8 -j RETURN
-A OUTPUT -d 127.0.0.0/8 -j RETURN
-A OUTPUT -d 192.168.0.0/16 -j RETURN
-A OUTPUT -o eth0 -p tcp -m tcp --dport 80 -j DNAT --to-destination 127.0.0.1:5123
-A OUTPUT -o eth0 -p tcp -m tcp --dport 443 -j DNAT --to-destination 127.0.0.1:5124
-A OUTPUT -o wlan0 -p tcp -m tcp --dport 80 -j DNAT --to-destination 127.0.0.1:5123
-A OUTPUT -o wlan0 -p tcp -m tcp --dport 443 -j DNAT --to-destination 127.0.0.1:5124
COMMIT
I saved it as redirect.rules and ran this command:
sudo iptables-restore ./redirect.rulesNow we shall install the package iptables-persitent. During the installation, it will ask you whether you want to save the current rules. Yes, you do. The redirection’s been set-up. Time to get the juicer running.
Install redsocks (if you haven’t already.) Save this in the file /etc/redsocks.conf
base {
 log_debug = off;
log_info = off;
log = "stderr";
daemon = on;
 user = redsocks;
 group = redsocks;
 redirector = iptables;
}
redsocks {
 /* `local_ip' defaults to 127.0.0.1 for security reasons,
 * use 0.0.0.0 if you want to listen on every interface.
 * `local_*' are used as port to redirect to.
 */
 local_ip = 127.0.0.1;
 local_port = 5123;
// `ip' and `port' are IP and tcp-port of proxy-server
 ip = 10.201.13.50;
 port = 80;
// known types: socks4, socks5, http-connect, http-relay
 type = http-relay;
login = "LDAP ID HERE";
 password = "LDAP PASSWORD HERE";
}
redsocks {
 local_ip = 127.0.0.1;
 local_port = 5124;
ip = 10.201.13.50;
 port = 80;
type = http-connect;
login = "LDAP ID HERE TOO";
 password = "LDAP PASSWORD HERE TOO";
}
Make sure you feed your own LDAP IDs and passwords. AT BOTH LOCATIONS. Feed your password as-it-is, no matter what special character it has. (Unless, of course, it’s a double-quote itself! Bit of a soup there.)
Now either restart your system, or run sudo service redsocks start
Voila! You have the ultimate solution to proxy! You may (or may-not) set a proxy in Gnome, Firefox, wget, gedit, whatever; it will work. This will not interfere with what you have set in Chrome/Firefox/whatever. In fact, I recommend that you explicitly set a proxy wherever you can. You see, redsocks has a knack of getting in a bundle sometimes (too many pending requests…,) in which case, a simple sudo service redsocks restart should suffice.
This also “fixes” those apps which provide no method of setting a proxy whatsoever, e.g, Gwibber. Sadly, unsupported protocols still won’t work. Sorry, no Thunderbird, no torrents, no irc.
PS: This is the exact same method used by the Android app ProxyDroid to provide system-wide proxy on rooted Android devices.
Sunday, April 15, 2012
How to restore missing gnome panel
Open a terminal and try
$gconftool --recursiv
How to Convert MTS to AVI in Linux
Try this
$ ffmpeg -i InputFile.MTS -vcodec libxvid -b 18000k -acodec libmp3lame -ac 2-ab 320k -deinterlace -s 1440x1080 OutputFile.AVI
$ ffmpeg -i InputFile.MTS -vcodec libxvid -b 18000k -acodec libmp3lame -ac 2-ab 320k -deinterlace -s 1440x1080 OutputFile.AVI
Friday, February 3, 2012
Setting up a NIS slave server
This note explains how to setup a nis slave server. It is assumed that you have a NIS server running .

  Setup
       Existing NIS server  named  mahalanobis  on 10.107.35.1
       The slave  server is to be set up  is named  gauss on 10.107.35.6

Install ubuntu 10. 04 Lucid on  gauss  10.107.35.6. Setup the network interface and make sure that it works as a standalone machine.


Install NIS software on Gauss

 # apt-get install   portmap nis

Setup the slave as a NIS client

 Edit /etc/yp.conf  and add

ypserver 127.0.0.1
Edit  /etc/hosts on master ( Mahalanobis) and add an entry for slave

10.107.35.6    gauss
Edit  /etc/hosts on  slave ( Gauss) and add an entry for master
10.107.35.6     mahalanobis


Log on to the master server. Add the slave server to the master
server's database map by editing the /var/yp/ypservers file on the
master.
 # File: /var/yp/ypservers
mahalanobis
  gauss

The make file in the /var/yp directory defines how the NIS server will
build the database map and how the master will relate to the NIS slave.
Edit the make file to allow the master to push maps to the slave.


# File: /var/vp/Makefile

# Allow the master to do database pushes to the slave
#
NOPUSH=false

Run make command. (You must be in /var/yp )

Iniitialise slave database
#  /usr/lib/yp/ypinit -s  mahalanobis

On   slave ( gauss) edit /etc/defaults/nis ) Change  the flag NISSERVER to slave

  # /etc/defaults/nis    Configuration settings for the NIS daemons.
#

# Are we a NIS server and if so what kind (values: false, slave, master)?
NISSERVER=slave


Restart   nis services on  slave

  #/etc/init.d/nis restart


Testing

   On a client machine which is being authenticated by the master edit /etc/yp.conf  and change the  ypserv  entry to point to the new slave machine.
Restart nis on that client machine and see if you are able to login.
Monday, December 12, 2011
Mount Ext4 partitios in Windows
Ubuntu partitions are incompatible with Windows, we can not read and write to them from widows. Ext4 partitions can be read from windows if you install a simple utility in Windows.
Download ext2fsd from
http://sourceforge.net/projects/ext2fsd/files/Ext2fsd/0.51/Find out Ext2Fsd-0.51.exe from the above site and install it. The following screen shots are self explanatory.


Sunday, December 11, 2011
how to clone ubuntu installation
Here is a quick way to build an exactly similar ubuntu installation on another computer.
Run
$ dpkg --get-selections >my_pakages
on the machine that you want to clone. Install a clean copy of Ubuntu on the target machine. Copy the file my_packages to the target machine.
Run the following command on the target machine.
$ sudo dpkg --set-selections < ./package_names
$ sudo apt-get -u dselect-upgrade
Done.
Subscribe to:
Posts (Atom)